
Before attempting DIY smart thermostat installation, assess your home's compatibility with modern HVAC systems and electrical setup. Follow a step-by-step guide for preparation, mounting, wiring, settings configuration, testing, and enjoy remote access via smartphone apps for precise climate control while saving on professional installers.
Looking to upgrade your home’s comfort without calling a technician? Installing a smart thermostat is easier than you think. This guide walks you through assessing your home for compatibility, unpacking and understanding your new device, and provides a step-by-step process for successful DIY installation. Learn how to make your home smarter, save on energy bills, and enjoy precise temperature control right from your smartphone.
- Assessing Your Home for Smart Thermostat Compatibility
- Unpacking and Familiarizing Yourself with the Device
- Step-by-Step Guide to Installing Your Smart Thermostat
Assessing Your Home for Smart Thermostat Compatibility
Before you begin the process of installing a smart thermostat without a technician, it’s crucial to assess your home for compatibility. Not all homes are equally suited for this technology. Key factors to consider include the type and age of your HVAC system, as well as whether your home wiring is up to the task. Modern homes with digital thermostats and standard electrical setups typically fare better, but older systems might require upgrades or alternative solutions.
Understanding “when to install a smart thermostat” involves recognizing both practical and financial considerations. Creating a connected home environment through smart thermostat installation can save energy and reduce utility bills. However, the decision should also be guided by your tech comfort level and willingness to invest in potential future maintenance. A plumber Bromsgrove can offer valuable insights if you’re unsure about any aspect of the process, ensuring a smooth transition to smarter temperature control.
Unpacking and Familiarizing Yourself with the Device
Unpacking your new smart thermostat is the first step in enjoying the benefits of advanced temperature control. Take a moment to familiarize yourself with its components and layout. Most smart thermostats come with a clear user manual that guides you through the setup process, making it easier for even tech-challenged users to install without a technician. The device itself is typically compact and designed to blend seamlessly into your home decor, often mimicking traditional thermostat forms.
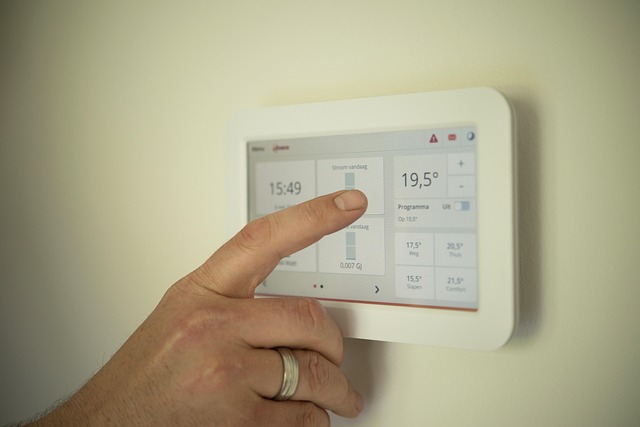
Once unpacked, locate the settings menu and start by connecting your thermostat to your home Wi-Fi network. This enables remote access through smartphone apps, allowing you to control your heating and cooling solutions from anywhere. Following the simple on-screen instructions or app guidance, configure your desired temperature settings and schedule personal preferences. This DIY approach saves you the hassle of contacting professional HVAC installers near me, and it’s a game-changer in managing energy usage and home comfort.
Step-by-Step Guide to Installing Your Smart Thermostat

Installing a smart thermostat yourself can seem daunting, but with a clear guide and some patience, it’s a straightforward process that can save you money and time. Here’s a step-by-step breakdown to help you navigate this DIY project:
1. Prepare Your Space: Turn off your home’s heating or cooling system before beginning. Remove the existing thermostat cover and take note of how it was installed—the location, wiring, and connections are crucial for installing your new smart thermostat. Ensure you have all necessary tools at hand, including a screwdriver and wire strippers.
2. Mount the Thermostat: Choose a suitable location for your smart thermostat, usually a wall near your main living area. Secure it in place using the mounting hardware provided. Some models may require screws, while others use adhesive strips or magnetic backing. Refer to your thermostat’s manual for specific instructions based on its design.
3. Connect Wiring: Identify the wires from your HVAC system and compare them to the wiring diagram in your thermostat’s manual. Ensure you connect the appropriate wires—typically marked with colors like red, blue, yellow, or white—to the corresponding terminals on your new thermostat. Double-check these connections before proceeding.
4. Configure Settings: Once installed, power on your smart thermostat and follow the setup instructions provided by the manufacturer. This usually involves creating an account through a compatible app or online portal. Here you can set preferences like temperature goals, scheduling, and auto-away modes to ensure optimal energy savings and comfortable living conditions.
5. Test Your Installation: After setting up, test your thermostat’s functionality. Make sure it connects to your Wi-Fi network and that the display shows accurate temperatures. Try changing settings and checking if your HVAC system responds accordingly. If you encounter any issues, refer to the troubleshooting section in your thermostat’s manual or contact customer support for guidance on resolving a fix smart thermostat not connecting or other smart temperature control issues.
6. Enjoy Your New Thermostat: Once everything is working smoothly, enjoy the benefits of precise climate control at your fingertips. With your new smart thermostat, you can schedule temperatures, receive energy usage reports, and even control your home’s temperature remotely using your smartphone, making it easier than ever to resolve smart temperature control issues at home.
Installing a smart thermostat yourself is an achievable task that can save you money and time. By assessing your home’s compatibility, understanding your device, and following a simple step-by-step guide, you can embark on this DIY project with confidence. With these straightforward instructions, installing a smart thermostat without a technician is not only possible but also empowering, giving you control over your home’s temperature and energy efficiency.